 Support Team
Updated:
Support Team
Updated:
Overview
In order to obtain the precise data you need, each Dashboard has a unique set of filtering options available so that you can narrow down your search. These filtering options are found on the right-hand side of the page.
Use the arrow tab in the center of the Filtering Panel to collapse or expand your view.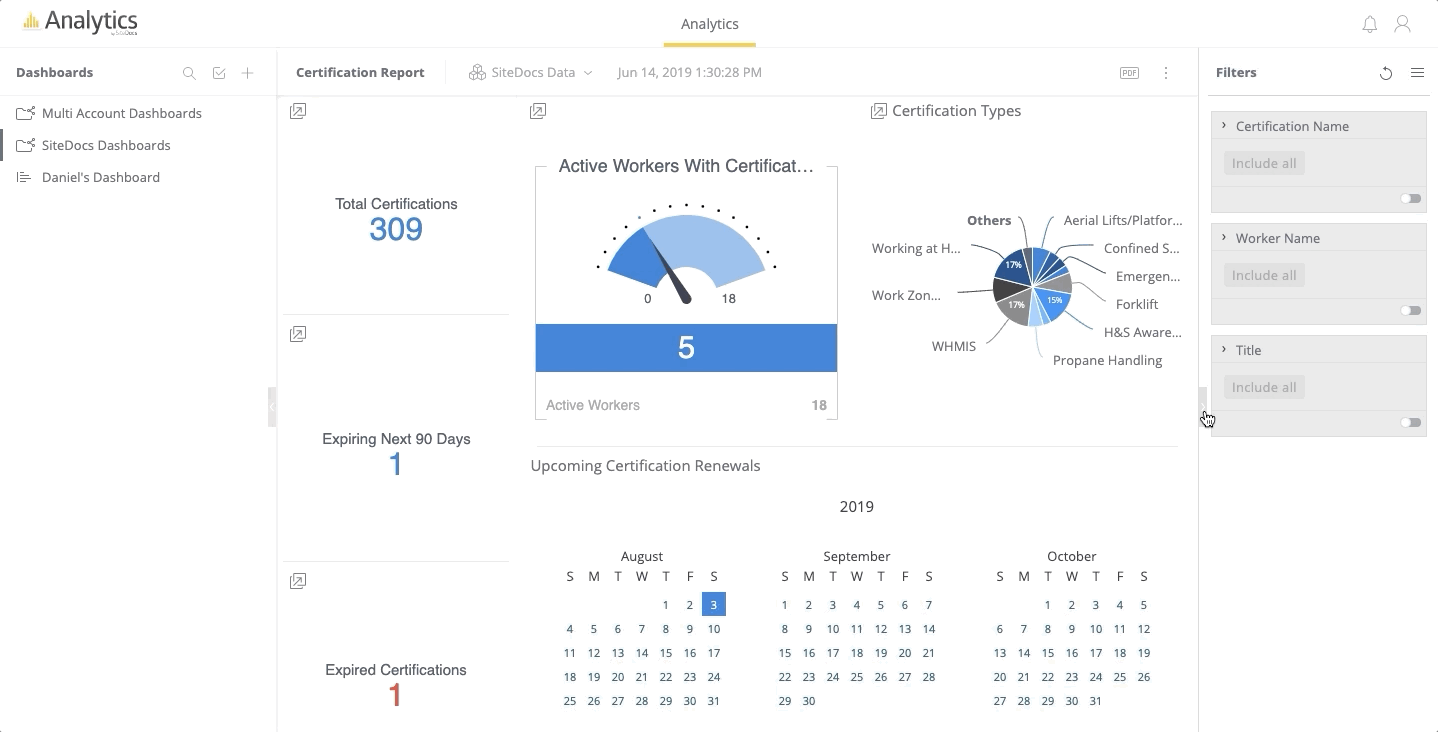
To add a filter to a Dashboard that you own or is being shared with you (With edit privileges enabled), click on the "+" on the top-right hand corner of your page.
There are a variety of data items you can use for filtering:
- Certification Name
- Location Name
- Worker Name
- Worker Title
- Form Template Name
- Label Field
- Follow Up Form Template Name
- Months/Days/Years in Date Form Was Completed
** Keep in mind, different Dashboards have different filters available. **
Filter Options
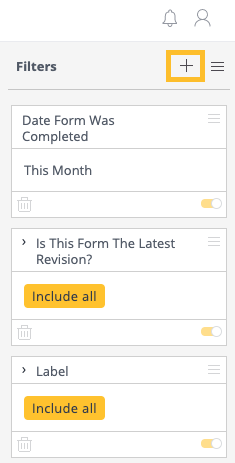
Each Dashboard comes with a set of Filters, which you can edit in order to obtain the precise data you need. Simply click on the Pencil Icon( ![]() ) on the top-right hand corner of the Filter to begin editing and select the “OK” button when you're done.
) on the top-right hand corner of the Filter to begin editing and select the “OK” button when you're done.
List
The List edit mode will allow you to select individual data items. The default is multi-select but you can also toggle the list to only allow single select. To find a specific data item, you can use the search bar or, when filtering Date ranges, you can use the drop-down menu to change the granularity of your selection to Quarters, Months, Days, etc.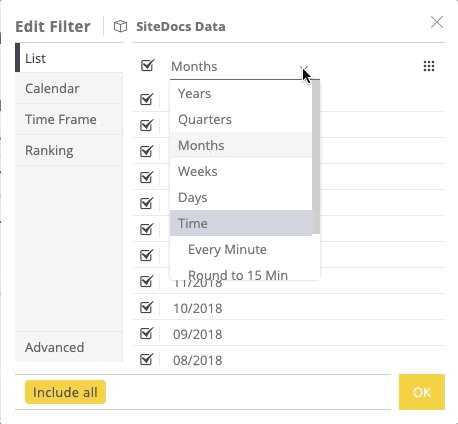
Calendar
The Calendar edit mode is available for Date data values and allows you to filter by selecting a specific date range.
Note: When selecting the date range, select the start date first and then the end date until you see a blue highlighted group of days.
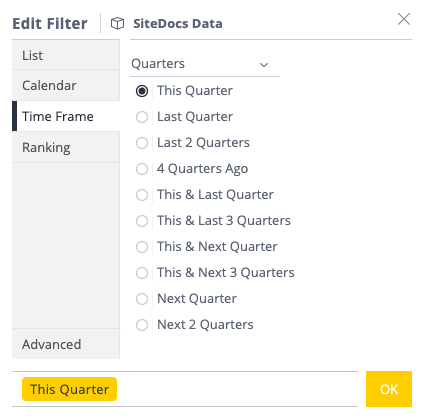
Time Frame
The Time Frame editing mode allows you to quickly filter by general time frames like Years, Quarters, Hours, etc. without having to select a specific date range through the calendar.
For example:
Ranking
The ranking filter allows you to filter all values that have a certain ranking, for example the top 10 workers. This filter allows you to change the number range for the ranking and whether you want to see the Top ranked or Bottom ranked items.
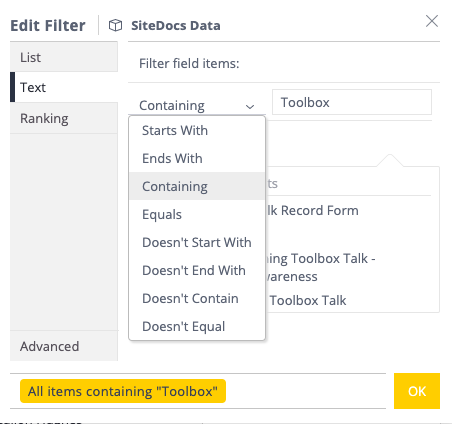
Text
The Text editor allows you to filter by specific keywords and modify your search by text “Containing”, “Equals”, “Doesn’t End With” and more. You can combine multiple rules together using 'AND' / 'OR' logic to achieve incredibly precise filters.
Filter Features
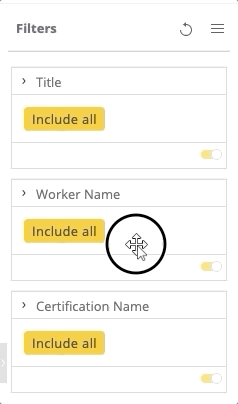
Moving Filter Widgets Around
To re-order filters, simply click and drag on the name of the Filter.
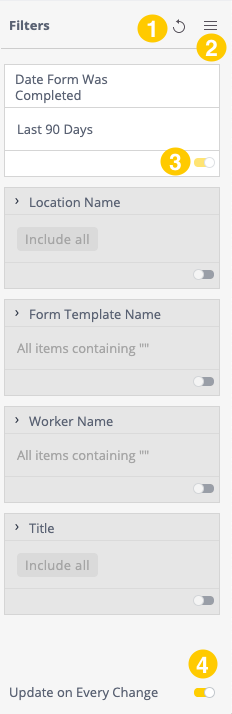
Restoring 'My Default' Filters ('1' in diagram below)
As you apply the filtering options to your Dashboard, you may want to reset the filters back to default. Click on the Restore My Default Filters button![]() to reset the filters.
to reset the filters.
Setting Default Filters ('2' in diagram below)
You can save certain filters so that the will apply by default to a certain Dashboard. Click on the 3 lines![]() on the top right corner of the Filter panel and select “Set as my Default Filters”.
on the top right corner of the Filter panel and select “Set as my Default Filters”.
Toggling Filters On/Off ('3' in diagram below)
Individual filters can be easily turned On and Off using the Toggle at the bottom of each filter.
Update on Every Change button ('4' in diagram below)
While this button is toggled on, the Dashboard will update each time a Filter is changed.
If this button is toggled off, you can adjust multiple filters without updating the Dashboard. Once you are ready to apply the filters, simply turn on the “Update on Every Change” button to update the Dashboard.
Comments